Photoshop实例教程打造爆炸效果
来源:岁月联盟
时间:2006-04-26
制作工具:Photoshop CS
制作过程:
1、新建宽度为12厘米,高度为12厘米,分辨率为150像素,颜色模式为RGB颜色,背景内容为白色的文件。
2、选择菜单栏中的“滤镜”“杂色”“添加杂色”命令,弹出的“添加杂色”对话框,各选项及参数设置如图01所示,然后单击好。

图01

图02
4、选择菜单栏中的“滤镜”“模糊”“动感模糊”命令,弹出“动感模糊”对话框,参数设置如图03所示,单击好,效果如图04所示。
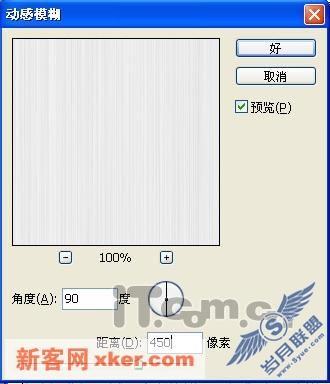
图03

图04
5、按“Ctrl+I”键,将画面反相显示。新建图层“图层1”,然后按“D”键,将工具箱中的前景色和背景色设置为默认的黑色和白色。
6、单击工具箱中的“渐变”按钮,选择“前景色到背景色”渐变样式。按住“Shift”键,将鼠标光标移动到画面中,按住左键由下至上拖拽鼠标,为“图层1”填充从前色到背景色的线性渐变色。
7、将“图层1”的“图层混合模式”选项设置为“滤色”模式,效果如图05所示,然后按“Ctrl+E”键,将”图层1“向下合并为“背景层”。
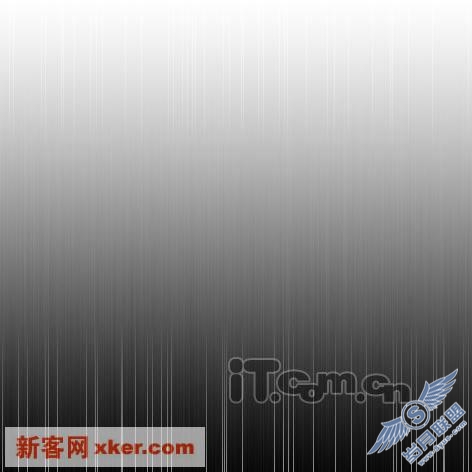
图05
8、选择菜单栏中的“滤镜”“扭曲”“极坐标”命令,在弹出的“极坐标”对话框中点选“平面坐标到极坐标”选项,然后单击好,效果如图06所示。
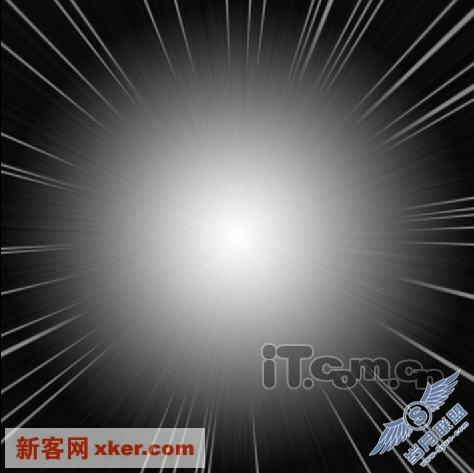
图06
10、调整画布大小后的画面效果如图07所示。
图07
11、选择菜单栏中的“滤镜”“模糊”“径向模糊”命令,弹出“径向模糊”对话框,各选项及参数设置如图08所示。单击好按钮,执行“径向模糊”命令后的画面效果如图09所示。
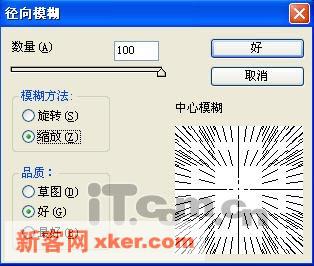
图08
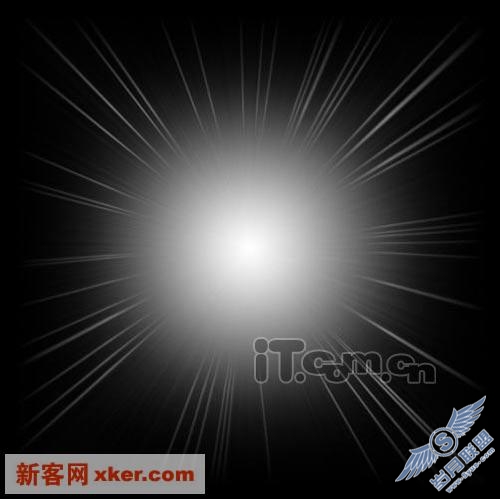
图09
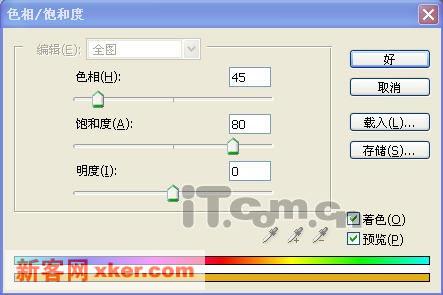
图10
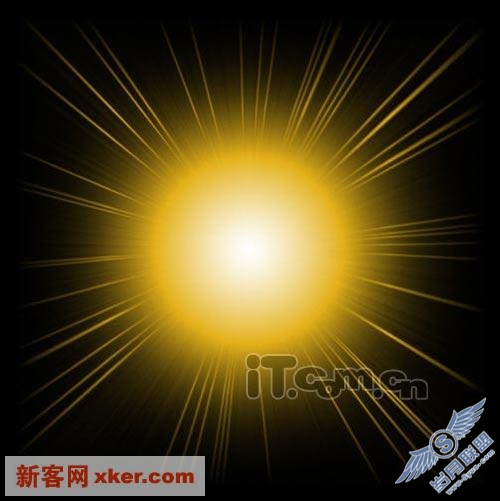
图11
13、新建图层“图层1”,并确认工具箱中的前景色和背景色为黑色和白色,然后选取菜单栏中的“滤镜”“渲染”“云彩”命令,为“图层1”添加由前景色与背景色混合而成的云彩效果,如图12所示。
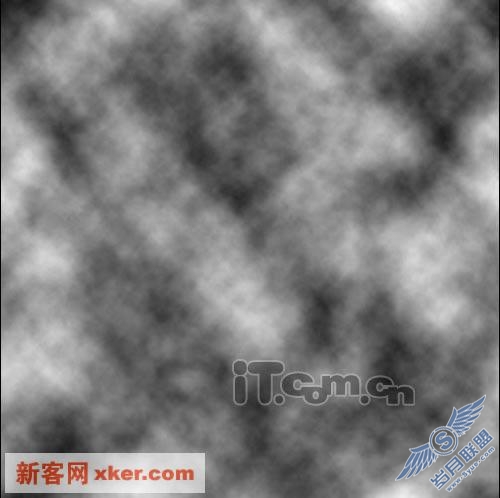
图12
14、将“图层1”的混合模式设置为“颜色减淡”,效果如图13所示。
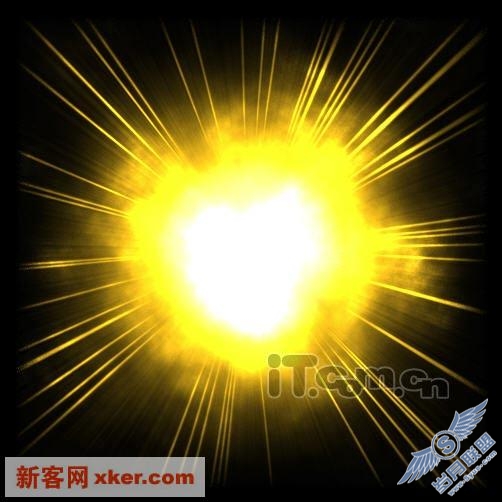
图13
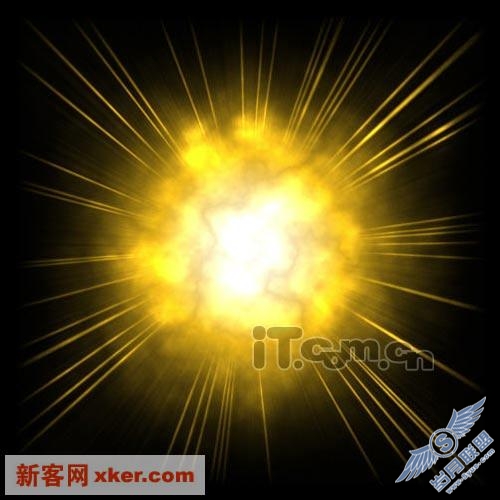
图14
上一篇:返回列表