颠倒黑白 Photoshop打造乡村之夜
来源:岁月联盟
时间:2008-10-06
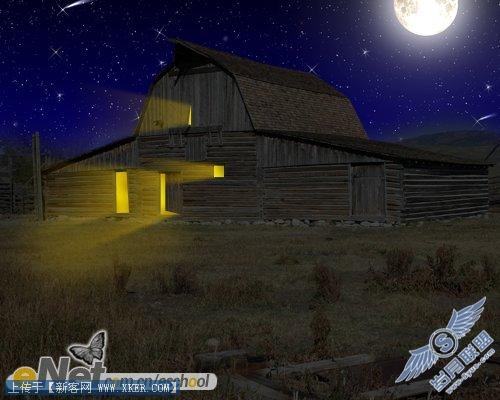
先看一下最终效果:
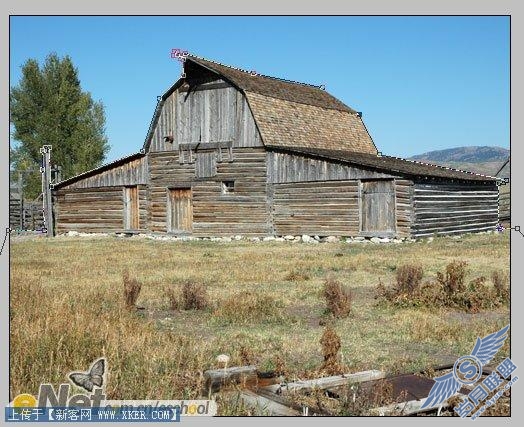
第二步:在工具箱中选择【钢笔工具】,选择路径模式,将建筑物勾出来,效果如下图所示。(林栖者语:注意路径是闭合的,图像的下方都被选择了,但是下图中没有显示出来)
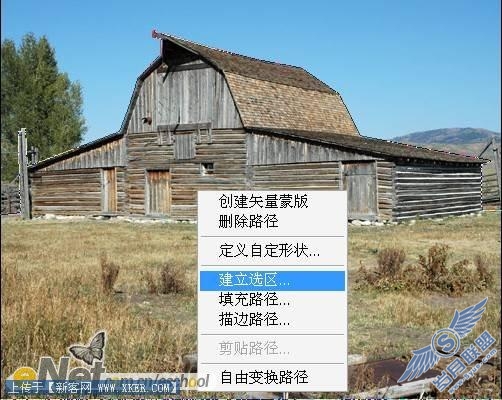
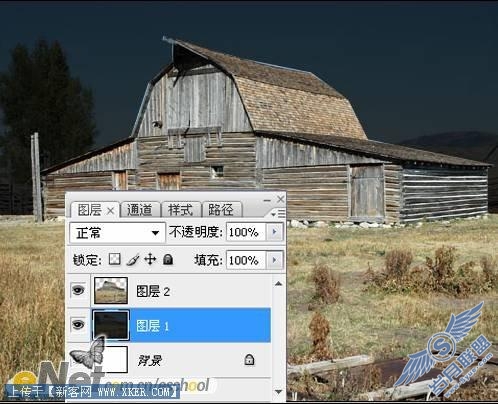
在图像上点击右键,在弹出的菜单中选择【建立选区】命令,如下图所示。按【Ctrl+C】键复制图层,再按【Ctrl+V】键粘贴,得到新图层【图层2】。
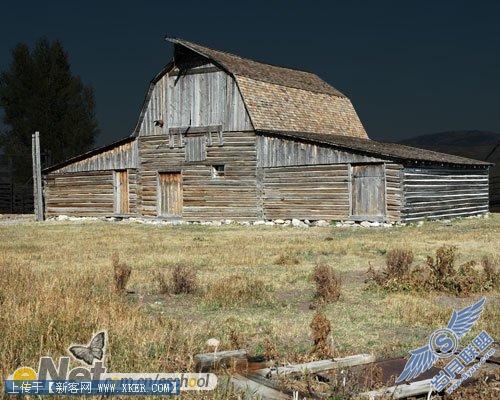
第三步:下面我们将天空调暗。方法是选择【图层1】,然后按【Ctrl+U】键调出【色相/饱和度】对话框,将【明度】调为-77,效果如下图所示。
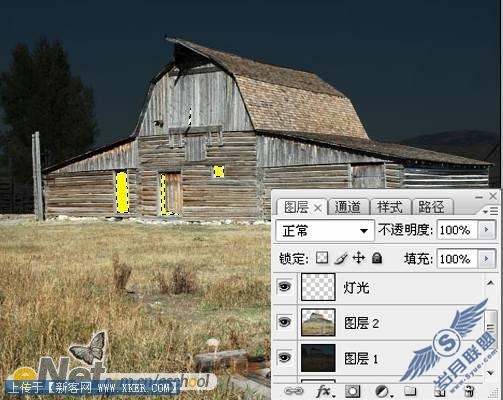
第五步:下面我们要添加一些光线。想像一下,房屋中点着灯,在寂静无人的夜晚,一定会有淡淡的灯光通过窗户或墙壁的裂缝透出来。我们新建一层,命名为【灯光】,使用【多边形套索工具】绘制如下图所示的选区,并用金黄色填充,效果见下图。
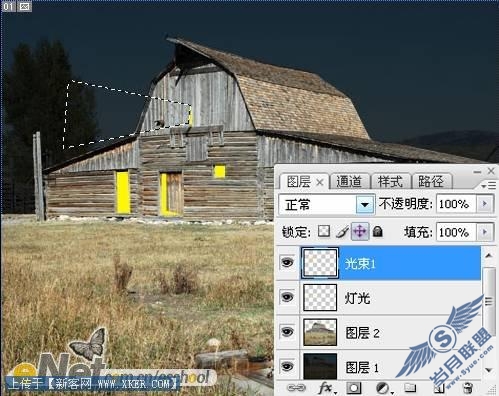
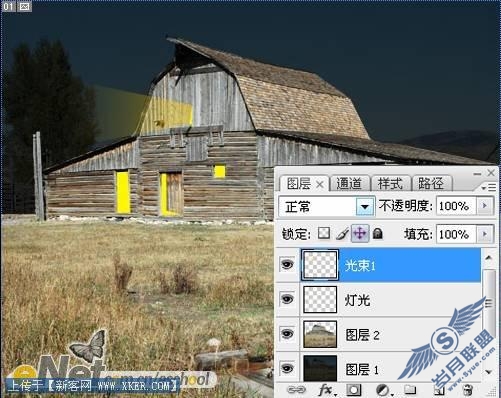
第六步:新建一层,命名为【光束1】,使用【多边形套索工具】做一个如下图所示的选区。
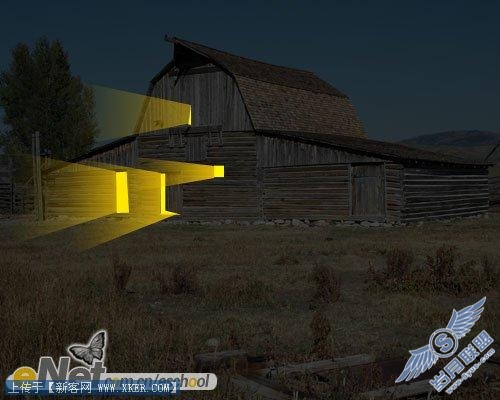
将前景色设为暗黄色(接近橘红色的那种颜色,此处是用来模拟从窗中透出的光束,因为原文中并没有具体的颜色值大家只好根据感觉自己调色了),选择【渐变工具】,渐变方式为前景色到透明的线性渐变,按住【Shift】键从右至左做一个渐变,如下图所示。(林栖者语:做渐变的时候需要反复尝试,才能达到满意的结果。另外,我在制作这个效果的时候为了表现光束的半透明效果,还降低了图层的不透明度,大家在制图的时候可以灵活使用。)
按照上面的方法为为每个窗子(或门)添加光束。(每个光束最好都在独立的图层中)
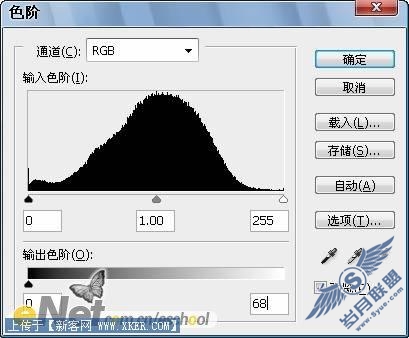
第七步:下面我们调整一下【图层2】的色阶。执行【图像—调整—色阶】命令,参数设置如下图所示。
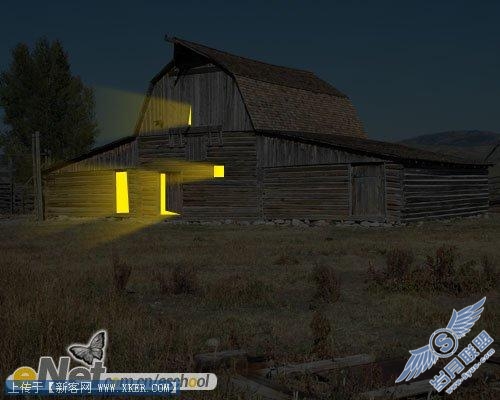
调整色阶后效果图如下。
第九步:现在我们的《乡村之夜》已经很漂亮,下面我们继续为它添加其它的效果。创建一个新的图层,命名为【发光】,选择一个柔性的笔刷,颜色和光束的颜色相同就可以了,然后、【发光】图层中涂抹,如下图所示。
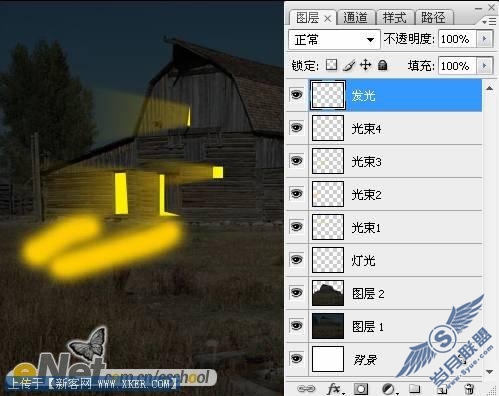
对【发光】图层执行【滤镜—模糊—高斯模糊】命令,模糊半径约40像素左右。然后将该图层的图层不透明度改为30%,效果如下图所示。(林栖者语:图层的不透明度大家可以根据具体情况自己调节,不必跟教程中的一样。)
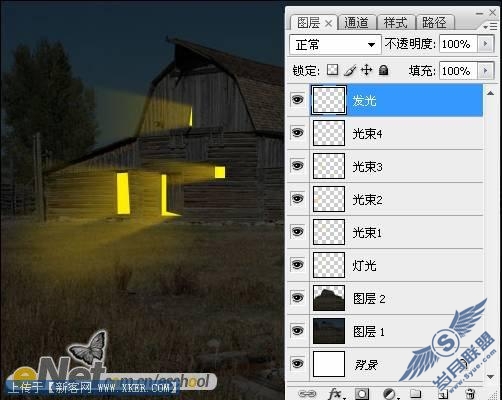
第十步:现在的效果已经比较完美了,但仍有你需要修饰的地方。我们都知道窗子中的灯光不会是像上图那样“完美无瑕”,一般都会有明暗。我们在【灯光】图层上新建一层,命名为【阴影】。按【Alt+Ctrl+G】键创建剪切蒙版,如下图所示。

选择【画笔工具】,将前景色设为橙色或棕色,在门及窗子的位置涂抹,制造一些“暗斑”,效果如下图所示。
下载PSD文件及无水印素材:http://xbbs.enet.com.cn/thread-2921551-1-1.html
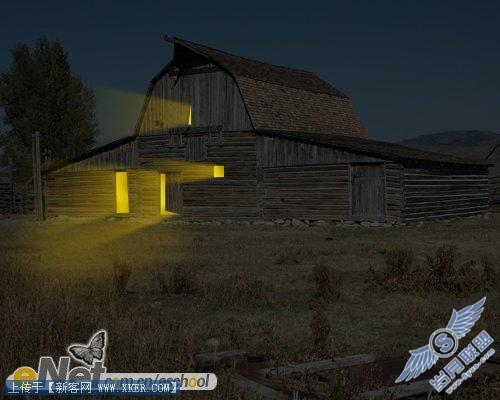
总结:到上一步为止,我们已经成功的将一张普通的乡村照片转换成了《乡村之夜》,达到了我们“颠倒黑白”的目的。下面是在此基础上创作的一些效果,希望可以给大家一些启发,制作出更迷人的乡村夜景。