晶莹剔透Photoshop打造水质感文字
来源:岁月联盟
时间:2007-06-07

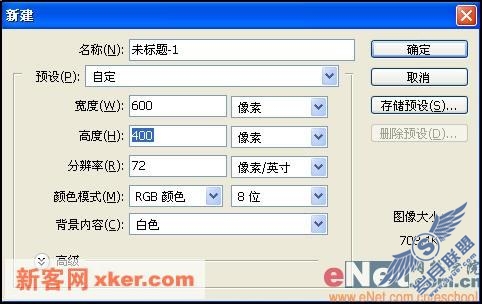
1.首先运行我们的好帮手Photoshop软件,接着新建一个600x400像素,72dpi的RGB图像。如图1所示。
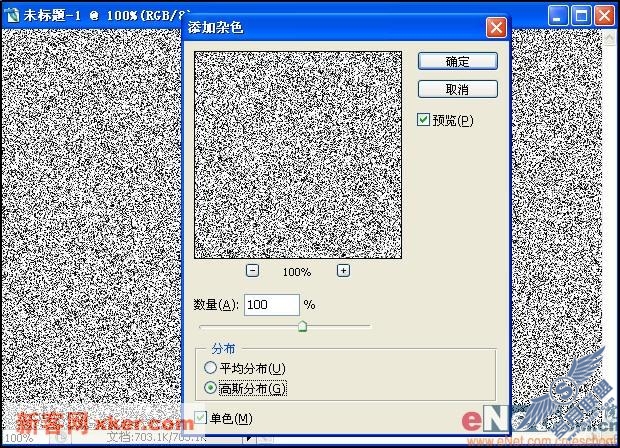
2.一上来就大刀阔斧,我们先做背景。执行率竟/杂色/添加杂色,数量设置为100%,分布为高斯分布,单色,单击确定按钮。如图2所示。
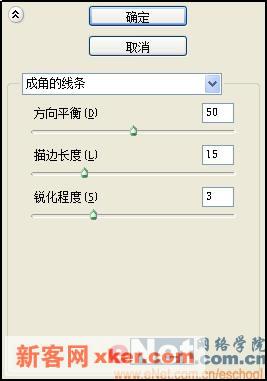
3.紧接着再执行滤镜/画笔描边/成角的线条,将方向平衡设置为50,描边长度设置为15,锐化程度设置为3,单击确定按钮。如图3所示。
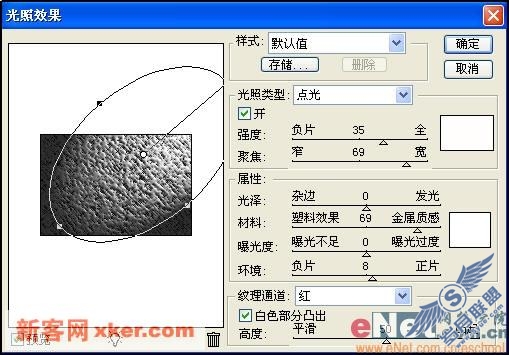
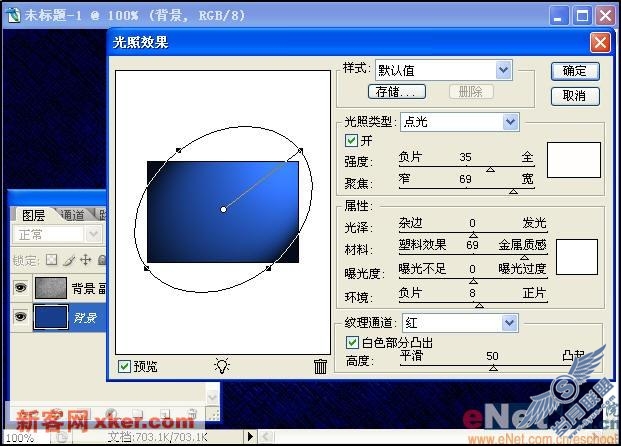
4.继续执行滤镜/渲染/光照效果,将光照区域调整为如图所示的位置,另外将“纹理通道”项设置为“红”,其他内容保持默认设置不变即可。如图4所示。
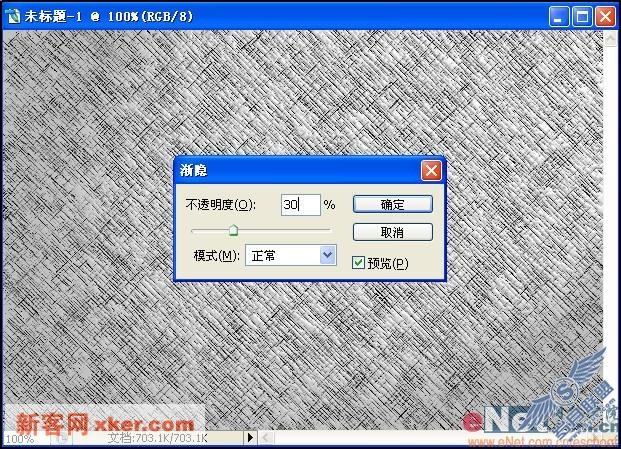
5.执行编辑/渐隐光照效果命令,将不透明度调整为30%,其他不变,按下确定按钮。如图5所示。
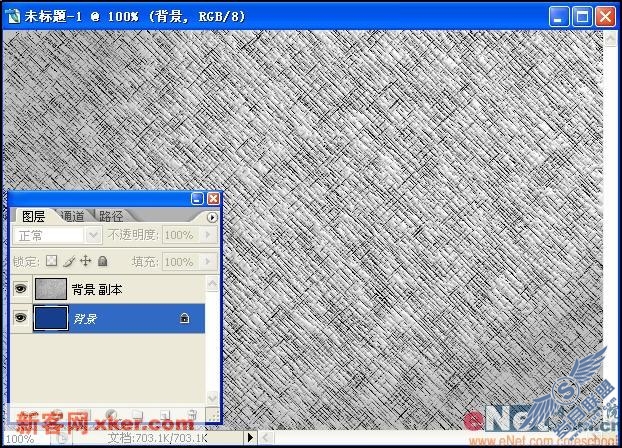
6.将背景图层复制一层,然后将背景图层填充深蓝色。如图6所示。
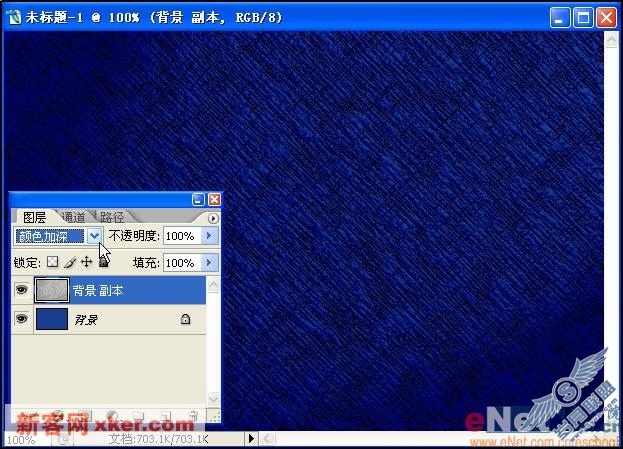
7.将背景副本图层的图层混合模式更改为“颜色加深”这样就可以透过背景副本图层看到背景图层了。如图7所示。
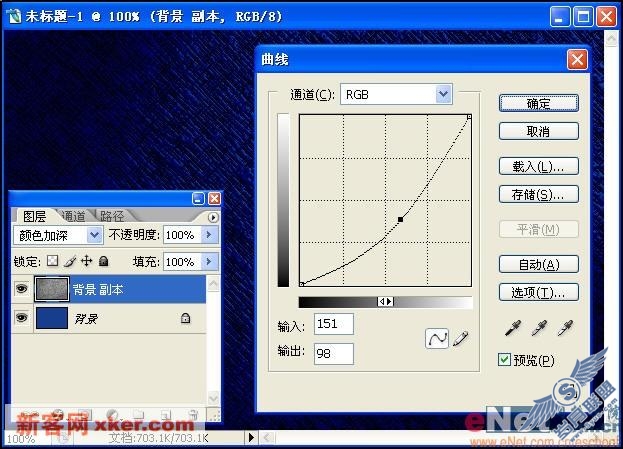
8.选中背景副本图层进行操作,按下Ctrl+M打开曲线调板将整体明度调低一些。如图8所示。
9.选中背景图层进行操作,执行滤镜/渲染/光照效果,将光照的范围调整到合适位置,其余设置与第四步中的光照效果设置相同。如图9所示。
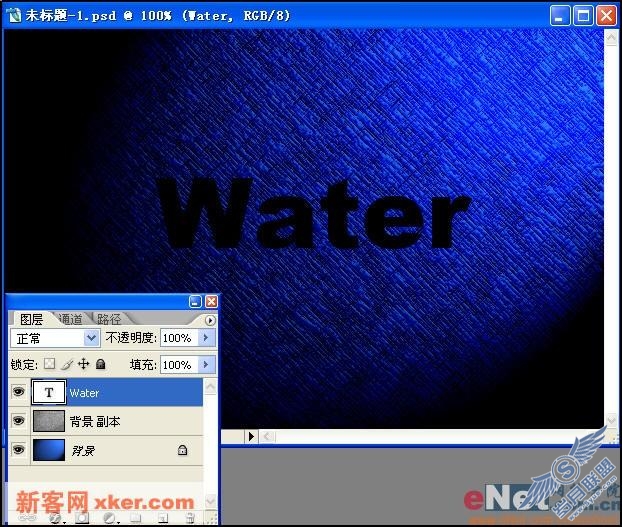
10.背景的制作就告一段落了。接着选择文字输入工具输入文字“Water”并将文字设置为黑色。如图10所示。
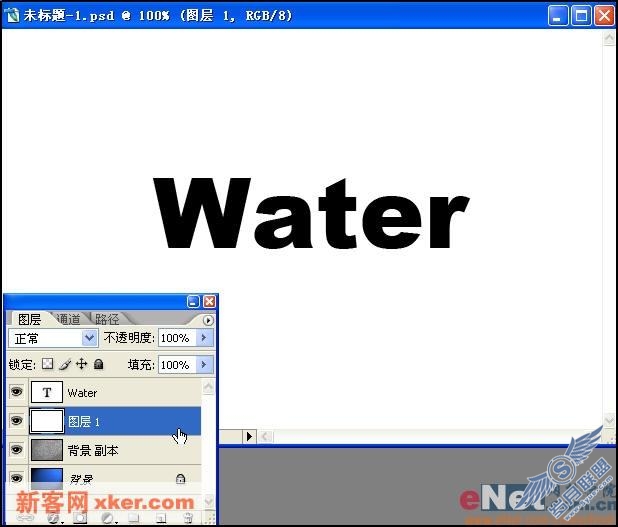
11.在文字图层下方建立图层1并填充白色。如图11所示。
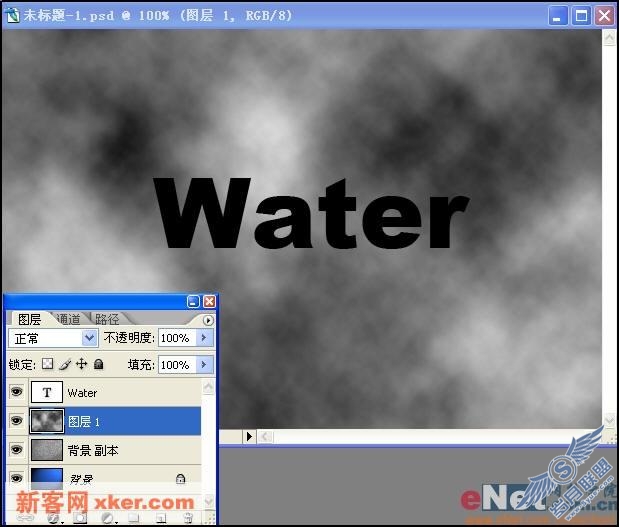
12.选中图层1进行操作,执行滤镜/渲染/云彩,如果效果不合适可以反复按下Ctrl+F来执行云彩滤镜,直到满意为止。如图12所示。
13.执行滤镜/素描/图章命令,将“明/暗平衡设置为24”,平滑度设置为40,单击确定按钮。如图13所示。

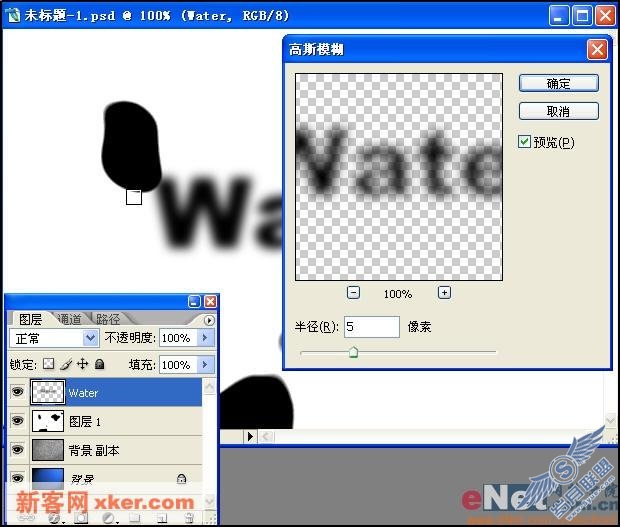
14.接下来选择文字图层,执行滤镜/模糊/高斯模糊,将模糊半径设置为5像素,按下确定按钮。如图14所示。
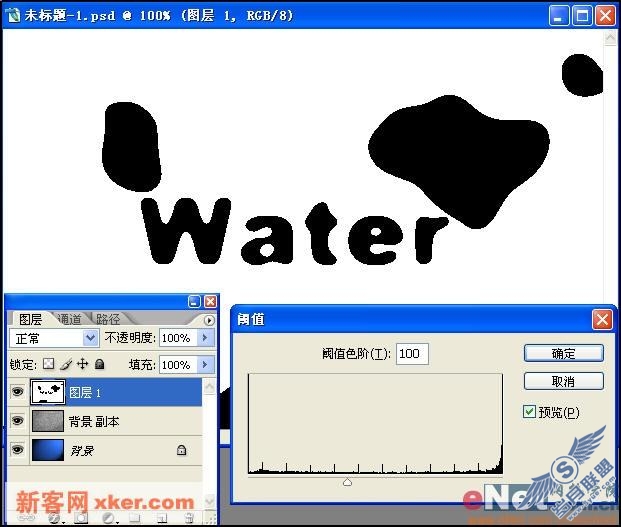
15.按下Ctrl+E向下合并,将文字图层与图层1合并为一个图层,然后执行图像/调整/阈值,将文字的边缘处理清晰。如图15所示。
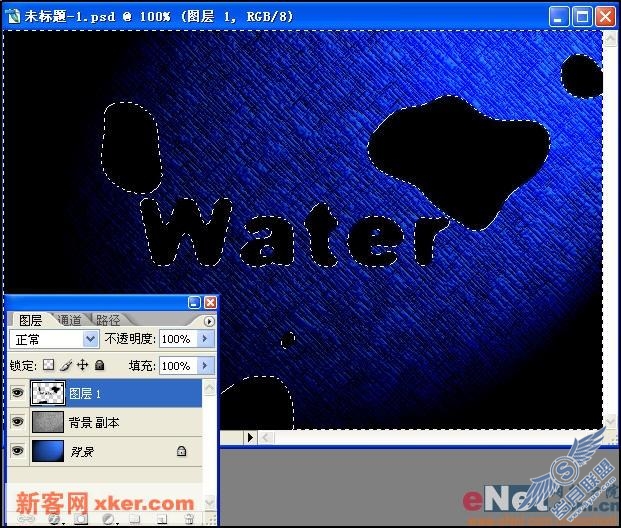
16.使用魔棒工具选取白色部分然后按下Delete键将其删除,留下黑色的部分。如图16所示。
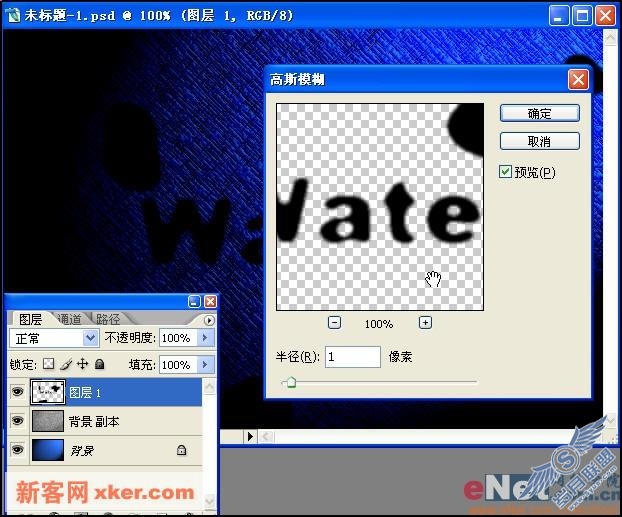
17.再次执行滤镜/模糊/高斯模糊,将模糊半径设置为1像素,这样使文字更加柔和。如图17所示。
18.接着将图层1的填充度设置为0%,这样就在画布中看不到图层1中的内容了。如图18所示。

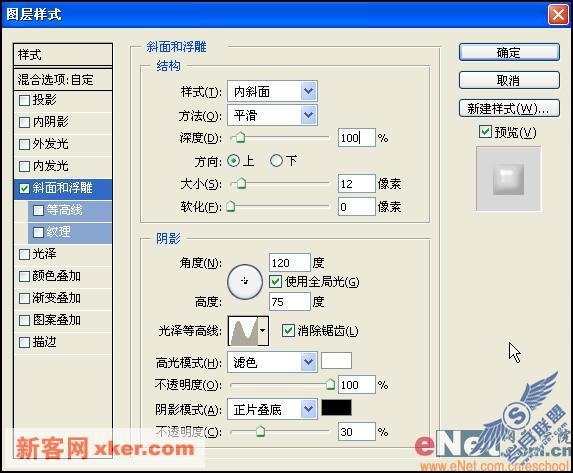
19.双击图层1打开图层样式的设置界面,首先添加“斜面和浮雕”样式,将深度设置为100%,大小为12像素,软化0像素,阴影角度为120,高度75度,并将光泽等高线设置为如图所示的样式,其他设置参见图片。如图19所示。
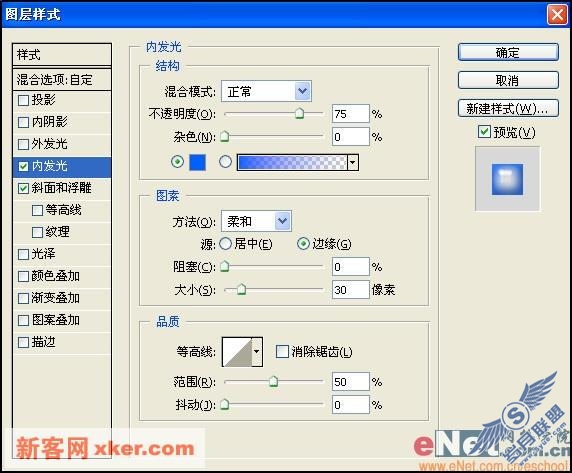
20.接下来添加“内发光”样式,将颜色设置为浅蓝,大小设置为30像素。如图20所示。
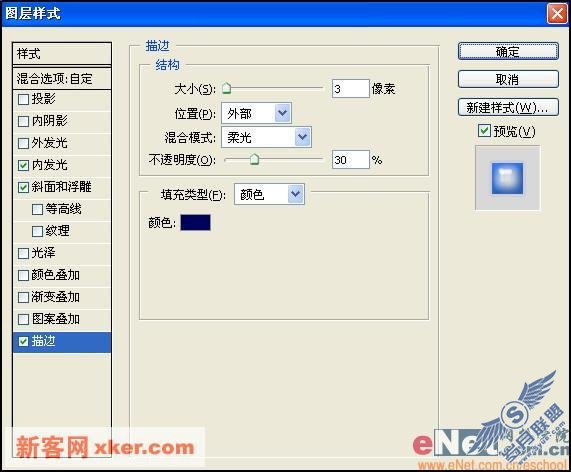
21.继续添加描边样式,大小3像素,混合模式为柔光,颜色设置为更深一些的蓝色。如图21所示。
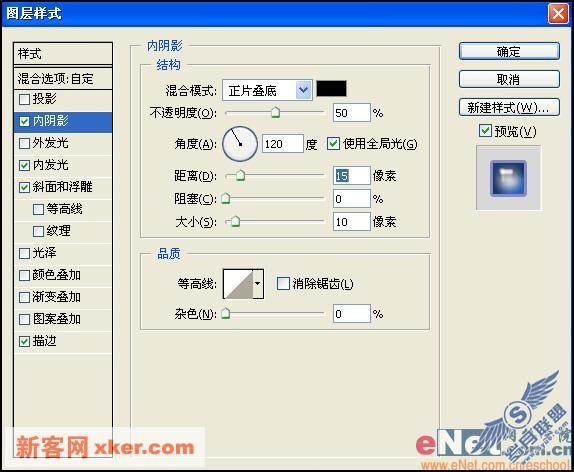
22.添加内阴影样式。不透明度设置为50%,距离为15像素,大小10像素。如图22所示。
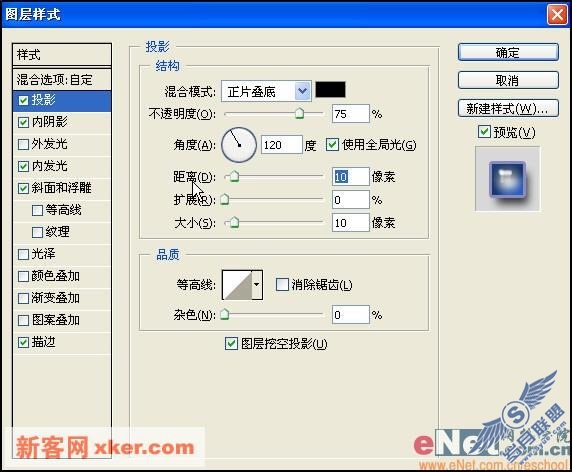
23.然后添加投影样式。距离为10像素,大小10像素。如图23所示。
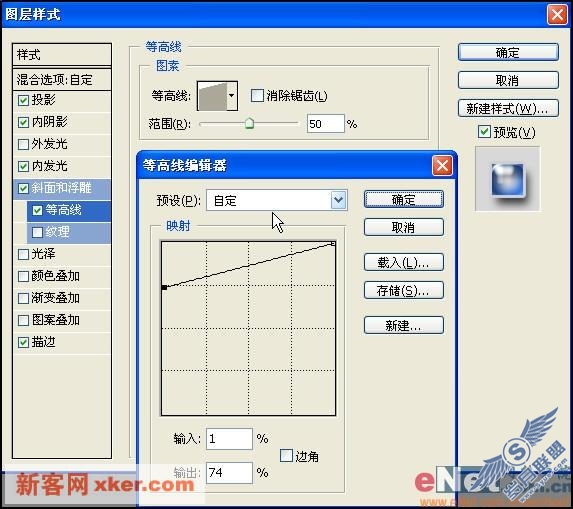
24.最后为了效果更鲜明,我特意将“斜面与浮雕”下的“等高线”进行了调整。如图24所示。
25.最后进行一些修饰,整幅作品就制作完成了。希望大家喜欢。如图25所示。