Photoshop打造喜庆新年节日海报
来源:岁月联盟
编辑:zhuzhu
时间:2008-01-03
Photoshop打造喜庆新年节日海报内容简介:先看一下最终效果: 副标题 制作工具:Photoshop CS 制作过程: 1、执行文件新建命令,打开新建对话框,新建宽度为10厘米,高度为5厘米,分辨率为350像素的白色文件。 2、选择工具箱中的横排文字工具,在字符面板中设 先看一下最终效果:

制作工具:Photoshop CS
制作过程:
1、执行文件新建命令,打开新建对话框,新建宽度为10厘米,高度为5厘米,分辨率为350像素的白色文件。
2、选择工具箱中的“横排文字工具”,在字符面板中设置参数,输入文字,调整位置,图像效果如图01所示。

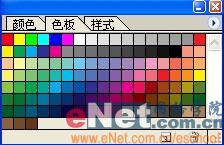
3、打开菜单栏中的“窗口”“颜色”“色板”,效果如图02所示,为前景色选择不同的颜色,单击工具箱中的“油漆桶工具”,对文字的每一个字母进行填充,效果如图03所示。

4、选择背景层,设置前景色为橘黄色,按Alt+Delete键进行填充,效果如图04所示。

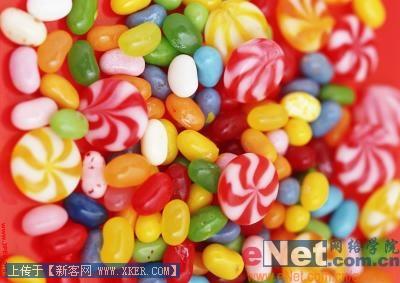
5、执行菜单栏中的“文件”“打开”命令,打开一幅背景素材,效果如图05所示。
6、单击工具箱中的“移动工具”,将图片拖至文件中,生成图层1。执行菜单栏中的“编辑”“自由变换”命令,对图像进行适当的缩小处理,图像效果如图06所示。

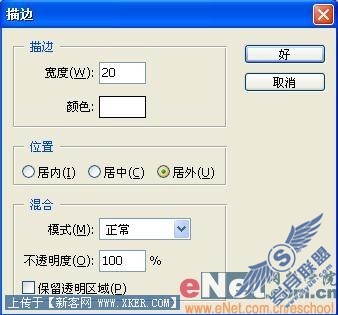
7、在图层1上方新建图层2,按下Ctrl键单击文字图层的图层缩览图,载入选区。执行菜单栏中的“编辑”“描边”命令,并在弹出的对话框中设置“宽度”为20,颜色为白色,如图7所示,图像效果如图08所示。

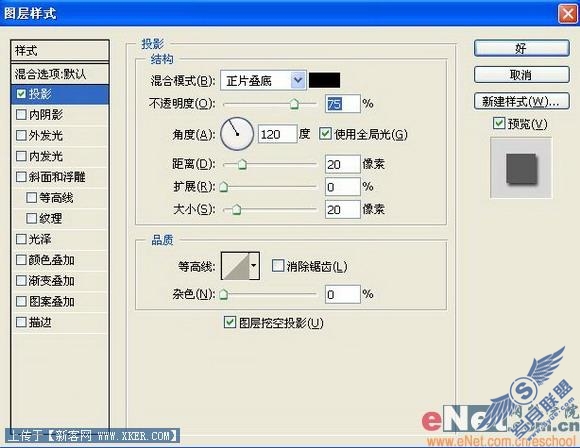
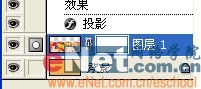
8、双击图层2,在弹出的图层样式对话框中勾选“投影”样式,设置参数如图09所示,图像效果如图10所示。

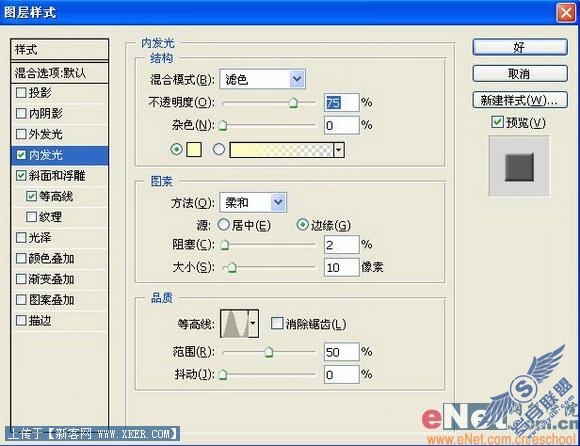
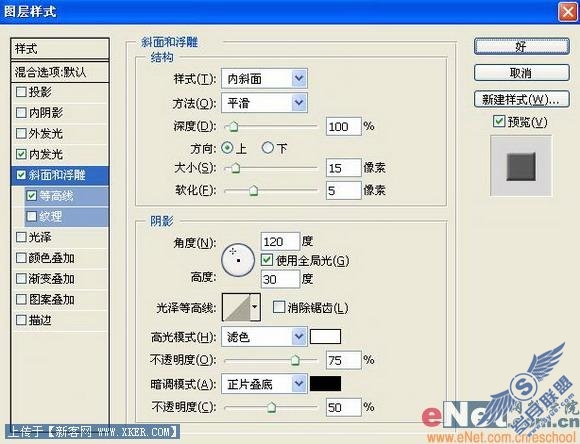
9、双击文字图层,在弹出的图层样式对话框中勾选“内发光”复选框,在面板中设置各项参数,如图11-13所示,图像效果如图14所示。


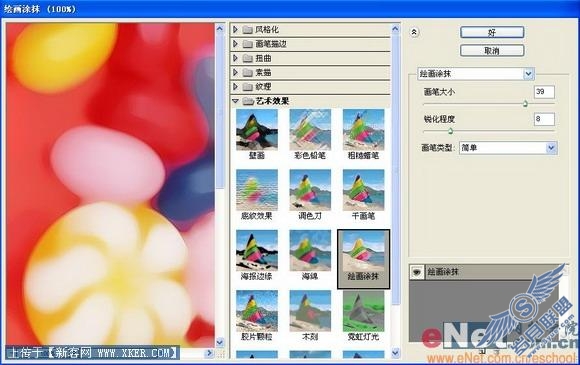
10、选择图层1,执行菜单栏中的“滤镜”“艺术效果”“绘画涂抹”命令,在弹出的对话框中设置参数如图15所示,图像效果如图16所示。

11、选择图层1,单击图层面板下方的“添加矢量蒙版”按钮,为图层1添加蒙版,效果如图17所示。
12、选择工具箱中的“渐变工具”在图层1的顶边从下往上进行绘制,图像的最终效果如图18所示。