Photoshop打造立体质感硅谷管道字
来源:岁月联盟
时间:2008-01-22

制作工具:Phoshop CS
制作过程:
1、新建一个宽度为10厘米,高度为10厘米,分辨率为300像素,模式为RGB的文件,内容为白色的文件。
2、在工具箱的下方设置前景色为淡蓝色,RGB值分别为148、192、200,选择工具箱中的“文字”工具,在文件窗口中输入文字,效果如图01所示。

3、按住Ctrl键,单击文字层,载入选区,然后将文字层删除,效果如图02所示。

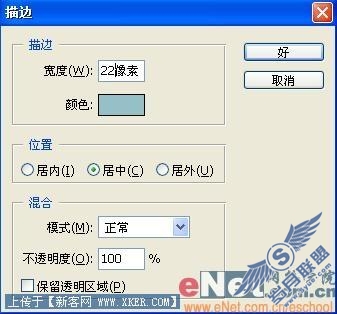
4、保留选区,在图层面板中新建图层1,执行菜单栏中的“编辑”“描边”命令,在弹出的描边对话框中设置宽度为22,颜色为淡蓝色,位置居中,其余默认,如图03所示,图像效果如图04所示。

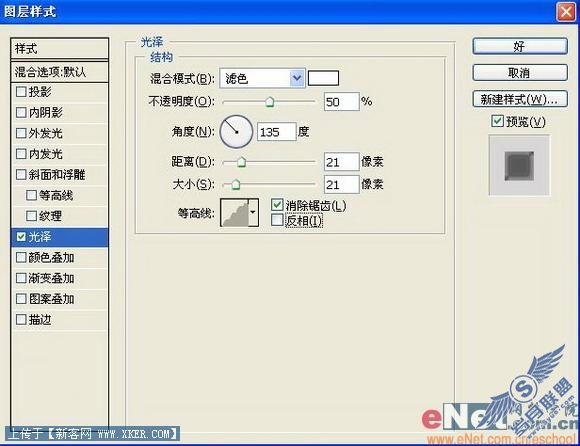
5、单击图层面板下方的“添加图层样式”按钮,在弹出的菜单中选择“光泽”命令,在弹出对话框中设置混合模式为滤色,颜色设置为白色,角度设置为135,距离设置为21,大小设置为21,等高线选择圆形台阶,勾选消除锯齿选项,如图05所示,图像效果如图06所示。

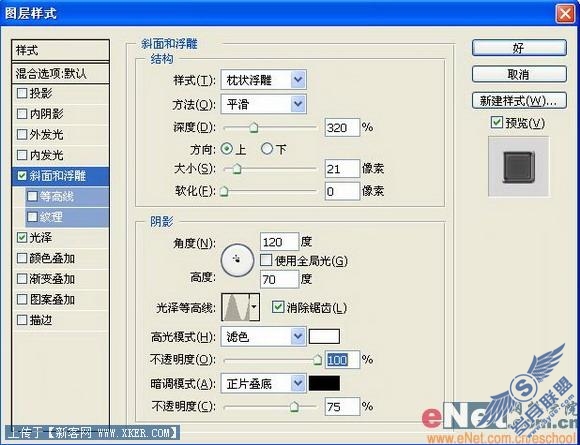
6、单击图层面板下方的“添加图层样式”按钮,在弹出的菜单中选择“斜面和浮雕”命令,在弹出对话框中设置样式为枕状浮雕,深度设置为320,大小设置为21,高度设置为70,光泽等高线选择环形,勾选消除锯齿选项,将高光模式的不透明度设置为100,如图07所示,图像效果如图08所示。

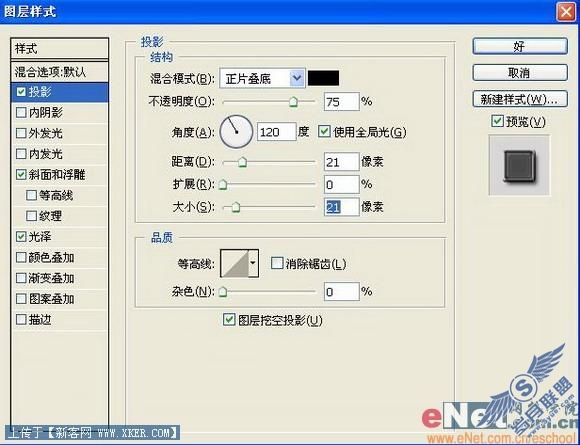
7、单击图层面板下方的添加图层样式按钮,在弹出的菜单中选择“投影”命令,在弹出的对话框中,设置距离为21,大小为21,如图09所示,文字最终效果如图10所示。